How to Test Your Home Water Quality at Home
Nearly one in five Americans get their supply from sources that can show hidden contamination at times. This fact makes a clear case for taking action now to assess what comes from your faucet.

This guide lays out simple, reliable ways to check drinking water with quick strip screens, targeted bacteria checks, and certified lab analysis. We spotlight the City Water Test Kit and compare fast screening products with deeper diagnostics so you can choose the right fit.
Expect a clear rundown of what a proper water test can reveal: metals, chemicals, pesticides, and microbiological signs that affect safety and taste. You’ll also get practical advice on when to retest after plumbing work or seasonal shifts.
By the end, you’ll know which product and approach balance speed, accuracy, and budget — and have a straightforward next step to interpret results and act if needed.
Key Takeaways
- Hidden contaminants are common; screening now can protect health.
- Rapid strips, targeted bacteria checks, and lab analysis each have a role.
- The City Water Test Kit covers metals, chemicals, and pesticides.
- Balance speed, accuracy, and cost when choosing a product.
- Retest after plumbing work or seasonal changes and act on confirmed issues.
Why testing your tap water matters right now for home water quality
Knowing what’s in your faucet supply today helps you act before small problems become costly.
A few common contaminants enter public and private supplies: metals like lead, chloride byproducts from disinfection, pesticides, and bacteria. Routine screening flags these issues early so families can protect health and taste.
Certain situations raise risk: aging pipes, nearby construction, seasonal runoff, and city main breaks. A simple baseline helps you document change after service work or weather events.
Even treated city systems can have localized problems inside buildings. Periodic checks at the tap catch issues between utility reports and guide timely fixes.

Collecting results over time supports choices—whether to add a filter, schedule plumbing maintenance, or contact local authorities when thresholds are exceeded.
| Scenario | Likely Contaminant | Recommended First Step |
|---|---|---|
| Aging plumbing | Lead, copper | Initial screening, then confirm with a lab |
| After heavy rain/runoff | Bacteria, nitrates | Do a bacteria-focused follow-up |
| Nearby construction or main break | Sediment, microbes | Baseline comparison and repeat sampling |
| New occupant or baby in house | Any unexpected spikes | Screen now and retest after plumbing changes |
Simple plan: an initial screen, targeted follow-ups, and lab confirmation when needed. This approach is usually more cost-effective than treating health or property problems later.
How to choose the right water testing kit for your home
Begin by identifying your source; this simple step steers every later decision about coverage and cost.
Match kit type to your source: city vs well
Municipal supplies tend to need checks for metals and disinfection byproducts. Private wells call for bacteria, nitrates, and iron screening. Pick products designed for that profile to avoid wasted expense.

Contaminant coverage vs budget
Strip-based options give broad, fast signals at a lower price. Targeted bacteria sets and certified lab panels cost more but confirm complex hazards. If budget is tight, start broad and escalate to lab analysis when results or symptoms warrant.
Turnaround time, accuracy, and ease of use
Rapid strips and bacteria assays deliver results in minutes to days. Labs return precise readings but take longer. Look for clear instructions, color charts, sealed pouches, labeled vials, and prepaid shipping to reduce errors and hassle.
- Tip: Multi-pack options cut the per-sample price if you plan routine sampling.
- Support: Choose brands with FAQs or phone help for interpreting results.
| Source | Focus | Recommended first step |
|---|---|---|
| City | Lead, copper, chlorine, byproducts | Broad strip then lab confirmation for positives |
| Well | Bacteria, nitrates, iron, metals | Bacteria kit first; lab panel if results are unclear |
Lab tests vs at‑home strip kits: which is best for your needs
Deciding between lab analysis and quick strip products comes down to accuracy needs, budget, and how fast you need results.
When a certified lab water test is worth it
Choose a certified lab when you suspect metals, complex chemicals, or low-level contaminants that need precise measurement.
Labs deliver instrument-grade analysis and clear numeric results that compare directly to regulatory limits. They cost more and take longer, but they are necessary for real estate closings, legal disputes, or when strip results conflict.
When rapid at‑home test kits are sufficient
Rapid strips work well for routine screening, post-filter checks, or spotting trends over time.
They give quick signals at a low price and help you decide if a lab follow-up is needed.
- Start with strips for regular monitoring.
- If a strip flags an issue, send a lab sample for confirmation.
- Document and repeat tests after any remediation.
| Need | Best route | Why |
|---|---|---|
| Legal or real estate | Lab analysis | Certified results and formal reports |
| Routine checks | Rapid strips | Fast, low cost, trend spotting |
| Conflicting results | Hybrid: strip + lab | Screen fast, confirm precisely |
Key contaminants to check in drinking water
Common contaminants can affect taste, plumbing, and health. Focused screening helps you spot items that cause staining, corrosion, or illness. The City Water Test Kit covers metals, chemicals, pesticides, and common treatment byproducts.
Metals and heavy metals: lead, copper, iron, and other elements
Lead and copper often come from aging plumbing and solder. They can harm infants and cause metallic taste or stains.
Iron at low levels is an aesthetic issue but may signal corrosion or source changes when higher.
Chemicals, pesticides, and disinfection byproducts
Chemicals and pesticides can enter distribution systems from runoff or faulty treatment. Municipal monitoring also looks for disinfection byproducts formed during treatment.
These compounds may affect long‑term health and require lab analysis for reliable numeric results.
Bacteria and microbiological safety for wells and flooded properties
Wells, flooded basements, or pressure loss raise the risk of microbes. Bacterial contamination can cause acute health effects and needs prompt action.
Use rapid screening for initial signals, and send samples to a certified lab to confirm positives.
| Contaminant group | Common indicators | Typical screening method | When to confirm in lab |
|---|---|---|---|
| Metals (lead, copper, iron) | Stains, metallic taste, elevated levels | Strip panels, targeted metal analysis | Any positive or near‑limit result |
| Chemicals & pesticides | Odor, unusual taste, nearby runoff | Targeted chemical panels | Suspected exposure or regulatory concern |
| Disinfection byproducts | Chlorine odor, long‑term exposure risk | Lab GC/MS or certified lab panels | For chronic exposure assessment |
| Microbes | Coliform presence, illness after exposure | Bacterial culture or presence assays | Any positive culture |
- Note: pH and hardness affect metals’ solubility and corrosion. Track these factors when interpreting results.
- Retest after plumbing work, filter changes, or heavy rain events. Keep a log of results and corrective actions.
- Prioritize checks for older plumbing and for households with infants; focus on lead first.
Top lab-based water testing kits with current pricing and timelines
Not all lab-based panels deliver the same depth; some prioritize broad screening, others aim for trace-level detection. Below are practical options with price and turnaround so you can match need to budget and urgency.
City Water Test Kit — 12 Days in Lab
City Water Test Kit covers metals, chemicals, and pesticides with a 12-day lab timeline. It helps flag irregularities in municipal supply and older plumbing.
Regular price $225.00 — Sale $195.00.
Recommended comprehensive panel — 12 Days in Lab (RECOMMENDED)
Recommended comprehensive panel offers the broadest contaminant coverage and deeper analysis. Ideal when you need low detection limits and expanded VOC/pesticide screens.
Regular price $839.00 — Sale $780.00. Results in about 12 days.
Mid‑tier 5 Days in Lab options
For faster turnaround, consider mid-tier products that balance speed and scope.
- Regular $199.00 — Sale $180.00 (5 days).
- Regular $325.00 — Sale $290.00 (5 days).
Additional 12‑day options and premium analysis
Common city-focused choices include Regular $185.00 — Sale $135.00, Regular $299.00, and Regular $395.00. These tiered products offer varying panels for metals and common contaminants.
| Product | Regular | Sale | Lab time |
|---|---|---|---|
| City Water Test Kit | $225.00 | $195.00 | 12 days |
| Comprehensive panel (recommended) | $839.00 | $780.00 | 12 days |
| Mid‑tier fast option | $199.00 | $180.00 | 5 days |
| Mid‑tier fast option | $325.00 | $290.00 | 5 days |
When to pay more: Choose premium analysis for expanded panels, lower detection limits, or extra pesticide and VOC screens. A leaner panel works for routine screening and trend spotting.
Practical tips: Start with a city-oriented panel if on municipal supply and add a metals module when older pipes raise lead concerns. Order bundles if you plan before/after sampling. Kits include shipping materials and clear instructions to preserve chain-of-custody and reliable lab reporting.
Best at‑home strip-based water test kits for fast results
Strip-based panels deliver same‑day signals that help prioritize follow-up analysis or treatment. They are ideal for routine monitoring, quick post-filter checks, or sampling several taps before sending a lab sample.
Varify 17‑in‑1 Complete — quick multi‑parameter screening
Varify 17‑in‑1 Complete Drinking Water Test Kit includes 100 strips plus two bacteria testers and is a #1 Best Seller in pH test strips. It’s a strong value for frequent checks and fast clues about metals and basic chemistry.
All‑New 20‑in‑1 — higher strip count for routine sampling
The All‑New 20‑in‑1 product ships with 120 strips, giving broader parameter coverage and lower per‑sample price when you plan regular checks or multiple faucets.
21‑in‑1 — chemistry plus extra bacteria screens
The 21‑in‑1 option pairs 120 strips with four bacteria tests, a good pick for well users or households that want both chemical and microbial screening in one purchase.
SJ WAVE 16‑in‑1 — essential indicators
SJ WAVE covers pH, hardness, lead, iron, copper, and chlorine — a balanced product for city users focused on metals and disinfectant byproducts.
| Product | Strips | Includes bacteria? | Value note |
|---|---|---|---|
| Varify 17‑in‑1 | 100 | Yes (2) | Best seller; low per‑read cost |
| All‑New 20‑in‑1 | 120 | No | Good for frequent sampling |
| 21‑in‑1 | 120 | Yes (4) | Balanced chemistry + bacteria |
| SJ WAVE 16‑in‑1 | Varies | No | Focus on lead/iron/copper |
- Price tends to drop per strip as counts rise; multi‑packs add value for repeat users.
- ClimatePartner labels appear on some products for buyers who want certified lifecycle disclosures.
- Well water users should favor versions with bacteria screens; city users should focus on chlorine and metals.
- Store strips in sealed pouches and follow timing on color reads to improve accuracy. Log readings by tap and date before moving to a lab panel.
Targeted testing: bacteria test kits for home and well water
When pressure drops or wells are serviced, the risk of bacterial intrusion rises quickly.
When to prioritize bacteria tests after floods or pressure loss
Prioritize bacterial screening after flooding, heavy rain, well service, or any boil notice. Also test after a loss of pressure or pipe repairs. These events let microbes enter plumbing or a supply source.
Reading positive/negative results and next steps
Most common rapid kits show a clear color change or colony spot that tells you positive or negative within 24–48 hours. Read results in the manufacturer window and photograph the result for your record.
- If positive: Stop using faucet water for drinking or cooking. Use sealed bottled supplies or boil per local guidance.
- Schedule shock chlorination or a professional well disinfection. Send a certified lab sample to confirm the finding.
- If negative: Retest after heavy weather or maintenance and after any filter work to ensure no false negatives.
Use a representative tap and sterile technique to avoid false positives. Label each sample with date and conditions (post‑storm, after filter change). If results are ambiguous, escalate to a state‑certified lab for culture and species ID.
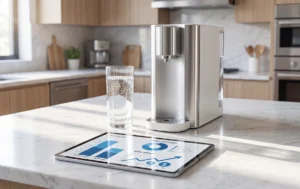
Supplemental tools: digital TDS/EC meters and what they reveal
A small handheld meter gives instant clues about dissolved solids and conductivity so you can spot changes fast. These meters measure total dissolved solids (TDS) in parts per million and electrical conductivity (EC). They also read temperature, which helps with automatic temperature compensation for consistent results.
Instant 4‑in‑1 TDS meter — what it offers
The Instant 4‑in‑1 TDS Meter reads 0–9990 PPM, reports EC, and shows temperature. It is labeled Amazon’s Choice and is marketed for RO systems, aquariums, and pools. That range covers very low to very high mineral loads for quick screening.
What TDS/EC can and cannot tell you
TDS indicates overall dissolved minerals or salts — a useful signal of change. EC reflects ionic content that conducts electricity. Together they flag shifts in levels that merit further analysis.
However, these meters do not identify specific elements or pathogens. A high PPM value does not say which element is present, and microbes remain invisible to TDS/EC readings.
- Practical uses: tune RO systems, compare faucets, and log baseline readings before and after filter changes.
- Correct use: rinse the probe, avoid air bubbles, immerse to the marked depth, and record readings at similar temperatures.
- Interpretation: very low PPM is common after RO, moderate values fit many municipal supplies, and higher readings may be normal for some wells. Sudden shifts are the key alert.
“Use TDS as a quick screening tool — not as a substitute for a full panel.”
| Indicator | What it signals | Next step |
|---|---|---|
| Stable low PPM | RO performing | Log and monitor |
| Moderate PPM | Typical supply minerals | Pair with strip screening |
| Sudden rise | Possible contamination or system failure | Send a sample to lab |
Record readings with date and location to spot trends. When numbers move unexpectedly, follow up with targeted strip screening or certified lab analysis to identify specific elements and confirm results.
Recommendations for city water vs well water users
Your source—municipal supply or private well—determines which parameters deserve first attention. That choice guides what panels or rapid screens to buy and when to escalate to a certified lab.
City systems: focus and first steps
For city connections, prioritize lead and copper screening alongside residual disinfectants and disinfection byproducts. These show how treatment and building pipes affect daily use.
If you notice metallic taste or staining, run a targeted metals panel and consider lab confirmation before swapping fixtures.
Well users: routine checks to schedule
Private wells need routine bacterial checks, plus periodic screening for iron, nitrates, and other metals. Hardness and pesticide screens matter if agriculture is nearby.
Establish a baseline after installation and retest after heavy storms, service, or unexplained odors.
- Choose source-aligned kits: municipal-focused panels for city systems; bacteria-inclusive packages for wells.
- When to escalate: order a lab panel for home purchase, well reactivation, or any positive initial result.
- Sample smart: use cold taps used for cooking, label source and date, and log any treatment devices in place.
- Seasonal plan: keep a testing calendar — spring runoff and fall maintenance often change readings.
| Source | Primary priorities | Action |
|---|---|---|
| City | Lead, copper, disinfectant byproducts, chlorine | City panel → lab if elevated |
| Well | Bacteria, iron, nitrates, pesticides | Bacteria screen regularly → lab for metals |
How to test tap water with confidence at home
Simple habits before you collect a sample make lab or strip readings far more reliable.
Step‑by‑step instructions to avoid contamination and bad samples
Wash your hands and rinse the faucet surface. Remove aerators when checking metals.
Use the supplied sterile bottle or strip and keep caps sealed until you are ready to use them. Do not touch pads or the inside of bottles.
Run the cold line for 30–60 seconds to stabilize temperature unless you need a first‑draw sample for lead. For first‑draw collection, do not run the line first.
Timing, temperature, and sample collection best practices
Read color pads at the exact seconds the manufacturer specifies and photograph each pad for your log.
Keep bacteria samples between 40–70°F when you collect and ship them the same day, ideally with tracked carrier info.
Label bottles with location, date, and time. Note any odors or discoloration and record numeric levels and expected result windows.
- Duplicate borderline reads to confirm results.
- Follow each product’s use instructions closely; procedures differ by brand and lab.
- Keep shipment tracking and note when results are expected for easier follow up.
Understanding your water test results and action levels
A clear approach to reading pads and lab pages helps you separate noise from signals that need fixes.
Interpreting color pads and lab reports for contaminants
Read color pads under bright, neutral light and follow the exact timing in the instructions. Hold the pad flat and compare to the chart at the prescribed second.
If a shade sits between two blocks, record the higher value and retest the same tap to confirm consistency.
Comparing results to health standards and guidance levels
Lab reports list results with units and detection limits. Look for any flagged exceedances and compare those numbers to federal or state standards.
- Flag: an exceedance needs prompt attention.
- Near‑limit: repeat the analysis and keep samples labeled by date and location.
“Save PDFs of lab reports and keep a dated log by tap — trends tell the real story.”
Tip: Minor fluctuations often reflect normal variability. If levels jump or stay high, contact the lab or manufacturer for next steps and consider a follow-up analysis.
What to do if your results show a problem
If your results flag a concern, act quickly to limit exposure and document each step.
Immediate safety steps for bacteria, lead, and other hazards
Bacteria: Stop using the affected source for drinking or cooking. Use sealed bottled supplies or boiled supplies if local guidance allows.
If you have a private well, consider shock chlorination and contact your local health department. Send a certified lab sample to confirm the finding.
Lead and copper: Avoid hot faucet use for consumption. Flush cold lines for several minutes, then collect a follow-up sample per guidance.
Use a certified point‑of‑use filter rated for lead if results remain high. Document filter model and change dates.
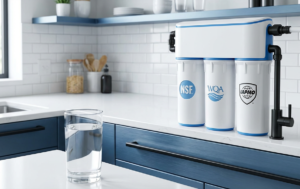
Choosing filtration, products, and when to go whole‑house
Select products certified for the specific contaminant—look for NSF/ANSI ratings for lead, VOCs, or microbes.
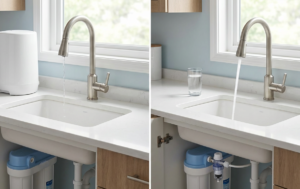
Point‑of‑use units (under‑sink carbon, RO, or lead‑removal cartridges) often solve single‑tap issues. Whole‑house systems suit sediment, iron staining, or broad distribution problems.
- Match technology to the contaminant: carbon for VOCs, RO or ion exchange for dissolved metals, iron filters for staining.
- Document purchases, installation dates, and maintenance to track effectiveness.
- Use temporary bottled or delivered supplies while permanent fixes are installed.
| Issue | Short‑term action | Long‑term fix |
|---|---|---|
| Bacteria | Boil or bottled supply; shock chlorinate well | Sanitation, regular monitoring |
| Lead/Copper | Flush; avoid hot tap | Certified POU filter; plumbing replacement |
| Iron (stain/taste) | Avoid affected taps; use RO or iron filter | Iron-specific treatment; retest |
Retest after any remediation and again later to confirm stability. If results exceed health benchmarks, engage local water professionals or the health department for next steps.
Standards, state resources, and lab certifications to look for
Knowing which standards apply makes interpreting analysis easier and helps you pick the right follow-up steps.
EPA guidelines and how to use them
The EPA sets national limits for many contaminants and publishes clear guidance for consumers. Use those numbers to see if a result exceeds a regulatory action level or a health advisory.
Tip: Compare your lab report to EPA MCLs and health advisories before acting. That helps focus remediation and avoids unnecessary expense.
State‑certified labs and local health support
For defensible results — especially in transactions or regulatory matters — choose a state‑certified lab with documented QA/QC. Certification improves confidence in numeric analysis and reporting.
Contact your local health department for recommended frequency, priority contaminants, and referral labs. They often offer guidance tailored to regional risks.
“Use accredited labs and keep chain-of-custody records to preserve sample integrity.”
| Item | Why it matters | What to ask |
|---|---|---|
| Accreditation | Shows conformity to standards and QA practices | Ask for scope and certificate number |
| Analyte scope | Ensures the lab can run the compounds you need | Request a list of methods and detection limits |
| Chain-of-custody | Protects sample integrity for legal or real‑estate use | Confirm tamper seals and shipping protocol |
Record the standards and references you used when documenting results. Keep lab reports, cited EPA pages, and any local advisories together for future research and action.
Value, price, and product comparisons to fit your budget
Budget decisions hinge on whether you need a quick screen or a full analytical panel.
Start by matching desired coverage to cost. Low‑cost strip packs give fast clues. Bacteria assays add microbial checks. Lab panels deliver precise numeric results and regulatory‑grade reports.
Cost vs coverage: strip kits, bacteria tests, and lab panels
Strip kits are cheapest per read and work well for routine trend spotting. Multi‑pack purchases lower unit price for repeat sampling.
Bacteria tests cost a bit more and are essential after floods or system work. Bundled assays save money versus single buys.
Lab panels range widely. Five‑day lab options (regular $199 → sale $180; regular $325 → sale $290) trade speed for modest price increases. Twelve‑day panels include city options (regular $225 → sale $195; regular $185 → sale $135) and premium panels (regular $839 → sale $780).
Regular price, sale price, and turnaround time trade‑offs
Faster lab timelines often cost more but are worth it for urgent decisions or real‑estate needs.
Paying a premium makes sense when you need expanded analyte lists, lower detection limits, or formal lab reports.
- Savings tip: buy multi‑strip packs, combine bacteria screens, or time purchases around sales.
- Decision path: begin with an affordable screening pack, then upgrade to a targeted lab panel if results raise concern.
- When to invest: choose the comprehensive panel for older properties, complex renovations, or persistent anomalies.
| Option | Regular | Sale | Lab time / Value |
|---|---|---|---|
| Strip multi‑pack | $Varies | Lower per‑read | Immediate; best for routine monitoring |
| Bacteria assay bundle | $Varies | Bundle savings | 24–48 hrs; useful after events |
| 5‑day lab panels | $199 / $325 | $180 / $290 | Faster results; moderate scope |
| 12‑day lab panels | $185–$839 | $135–$780 | Broader coverage; best for deep analysis |
Compare analyte lists, methods, and turnaround time rather than choosing on price alone. Archive purchase receipts and reports to track total cost and long‑term results. This helps balance immediate sampling with future retesting budgets and ensures confidence in product selection and ongoing monitoring.
Where to buy: trusted retailers and lab providers
Pick sellers that publish turnaround time and include prepaid mailers to save time and hassle.
Amazon is a fast option for popular products like the Varify 17‑in‑1 strip pack and the Instant 4‑in‑1 TDS Meter. Delivery speed, ratings, and #1 Best Seller or Amazon’s Choice badges help confirm demand and reliability.
ClimatePartner labels appear on select listings for buyers who want lifecycle carbon disclosures. Look for that mark if sustainability matters in your purchase decision.
Direct-from-lab purchases
Order city water panels directly from certified labs when you need chain-of-custody and formal reporting. Labs list 5‑day and 12‑day options with clear price bands: common sale points move $199→$180, $325→$290, and $839→$780 for comprehensive panels.
- Compare analyte lists and turnaround time (5 vs 12 days) to match urgency to scope.
- Well water users save by bundling bacteria screens with broader chemistry strips to reduce shipping.
- Verify sellers, check return policies, and confirm included items: vials, labels, and prepaid mailers.
| Where | Why choose | Typical price band |
|---|---|---|
| Amazon/retailers | Fast delivery, user reviews, best‑seller badges | $Varies; quick buys |
| ClimatePartner listings | Sustainability disclosures for lifecycle-conscious buyers | Comparable to retail price |
| Direct-from-lab | Chain‑of‑custody, formal reports, 5–12 day options | $180–$780 (sale ranges shown) |
Save order confirmations for your sampling log. Also check warranty and support options if you are new to this process—good customer service prevents delays and makes follow-up easier.
Present‑day insights: current best sellers and availability
Recent retail trends favor multi‑strip packs and meters that balance ratings, price, and fast delivery for weekend sampling. If you plan purchases this week, focus on stock, analyte breadth, and shipping time before committing.
#1 Best Seller highlights and quick buying guidance
Varify 17‑in‑1 Complete holds #1 Best Seller status in pH strips and is a smart starting product for routine screening. The All‑New 20‑in‑1 and 21‑in‑1 options also rank highly for value when you need many reads.
Instant 4‑in‑1 TDS Meter carries an Amazon’s Choice badge, showing a solid mix of reviews, price, and delivery speed. Look for ClimatePartner labels if lifecycle disclosure matters to you.
- Bundle size lowers per‑read price; larger packs cut unit cost.
- City buyers often pair a best‑seller strip with a metals lab panel when early results suggest an issue.
- Test multiple fixtures to rule out tap variability before buying a big panel.
“Scan recent customer reviews for tips on reading pads and proper storage.”
| Product | Availability | Buy advice |
|---|---|---|
| Varify 17‑in‑1 | High | Best for frequent sampling; good per‑read value |
| All‑New 20‑in‑1 / 21‑in‑1 | High | Choose for multi‑fixture checks; confirm bacteria inclusions |
| Instant 4‑in‑1 Meter | Amazon’s Choice | Fast delivery; use alongside strips for trend data |
Pro tip: set reorder reminders before seasonal checks and keep a backup during regional events when availability can shift quickly. Confirm included components—number of strips and any bacteria vials—so the product matches your needs.
Test tap water today to protect your home water quality: Conclusion
,
Keep it simple: pair a quick strip screen with lab confirmation when precision matters. This two-step plan saves money and reduces uncertainty.
If you moved recently, saw a change, or haven’t checked in a year, act now. Follow product instructions exactly and log date, tap, and result for future comparison.
Compare readings to recognized guidance and take immediate safety steps if any value is elevated. Choose a drinking water test that matches your source—city or well—and your household risk.
Use rapid strips for same‑day clarity, 5‑day lab services for quicker diagnostics, or 12‑day panels for deeper analysis. Pick reputable sellers and best‑seller products with clear analyte lists and support.
Final step: schedule retests after filter changes, plumbing work, or remediation. Start today to build a reliable baseline and protect your home water and peace of mind.